
This tutorial demonstrates how to completely disassemble a Samsung Galaxy S9 (Samsung Galaxy S9 Disassembly, Samsung Galaxy S9 Teardown). Step by step explained with pictures. Click here to go directly to the Samsung Galaxy S9 repairs.
The Samsung Galaxy S9, like its predecessors, needs to be opened from the back cover to the front. The back cover is glued and not screwed. The frame with the lateral buttons is part of the display unit, which is replaced during a repair.
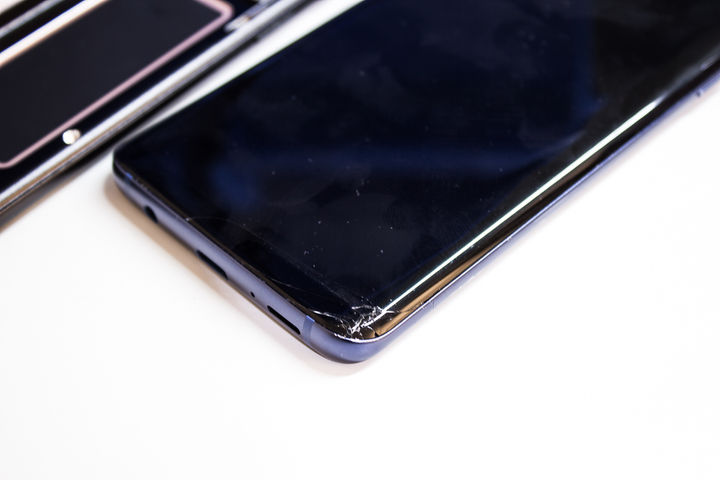
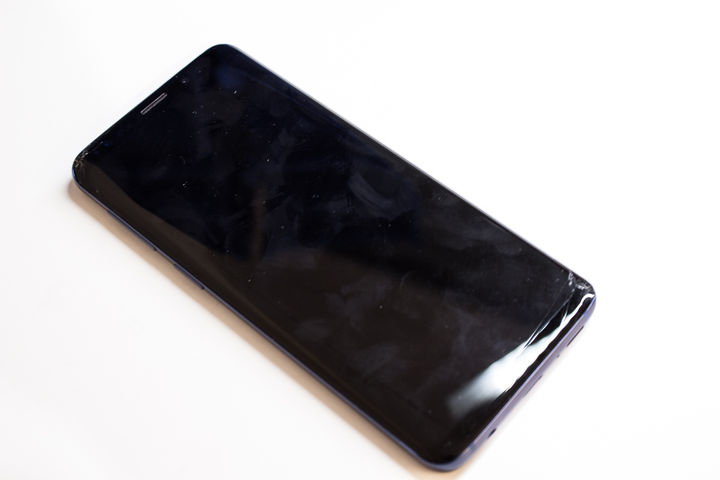
Since the display on the Samsung Galaxy S9 as well as the Samsung Galaxy S9+ reaches far to the edge at the top as well as the side, a glass breakage is quick. An impact on the aluminum frame can also cause the glass to break since the force is transferred from the frame to the display.
As mentioned earlier, the back cover is only glued. It can be removed most quickly with heat. Care must be taken not to damage the induction coil when opening it.
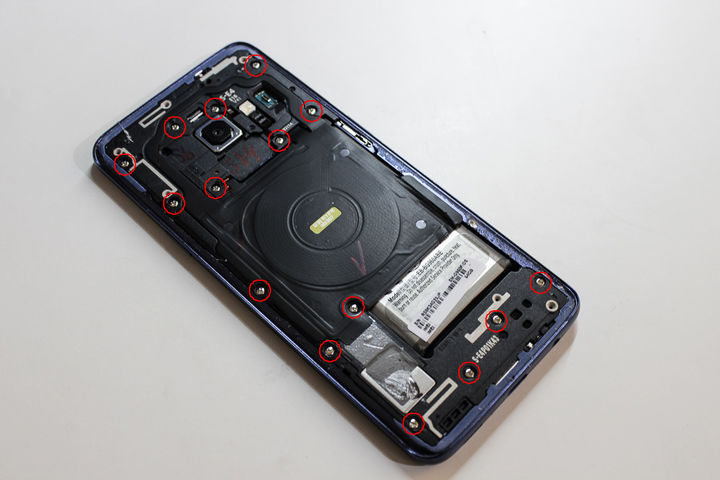
Once the back cover is lifted off, the 15 screws marked in red can be loosened. This allows the top and bottom plastic covers to be removed.
Once the back cover is lifted off, the 15 screws marked in red can be loosened. This allows the top and bottom plastic covers to be removed.

Before proceeding with disassembly, the SIM card holder should be removed. This prevents the removal of the mainboard.
Before the mainboard can be removed, all cables marked in yellow and the screws marked in red must first be loosened. After that, it is possible to carefully detach the mainboard.
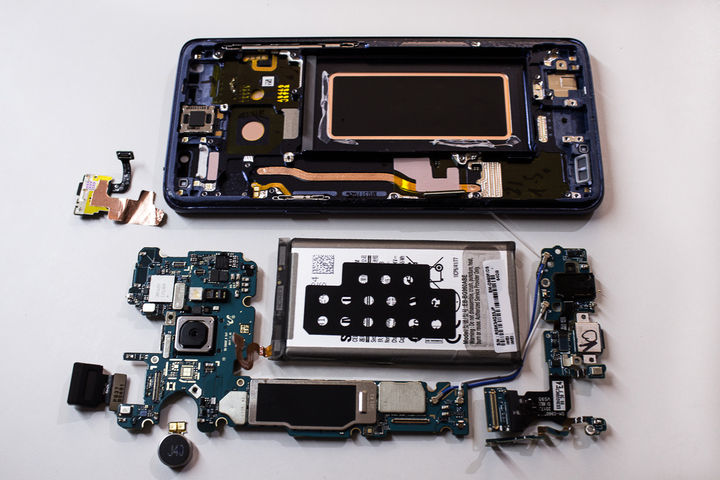
After the motherboard is removed, only the battery, front sensors and vibra unit need to be removed. All components can then be reinstalled in reverse.

Opening the device is done at your own risk. I assume no liability for any damage caused.
Nevertheless I think that this small overview can be useful for one or the other.
Of course, we offer this Samsung Galaxy S9 repair as usual. Here you can find the Samsung Galaxy S9 repairs like display repair, Samsung Galaxy S9 back cover repair and more.
If you have any questions or uncertainties, just write us a message.
Comments